Creating a unique VS Code theme can transform your coding experience, making it more personalized and visually appealing. In this guide, we’ll explore the steps to create and customize your own VS Code theme.
Customizing Existing Themes in VS Code
Transforming an existing VS Code theme to suit your personal taste involves a few straightforward steps. Here’s a detailed walkthrough to help you customize an existing theme:
Selecting and Forking a Theme
- Locate a Suitable Theme: Begin by browsing through the vast collection of themes in the VS Code Marketplace. Choose one that closely matches your desired aesthetic.
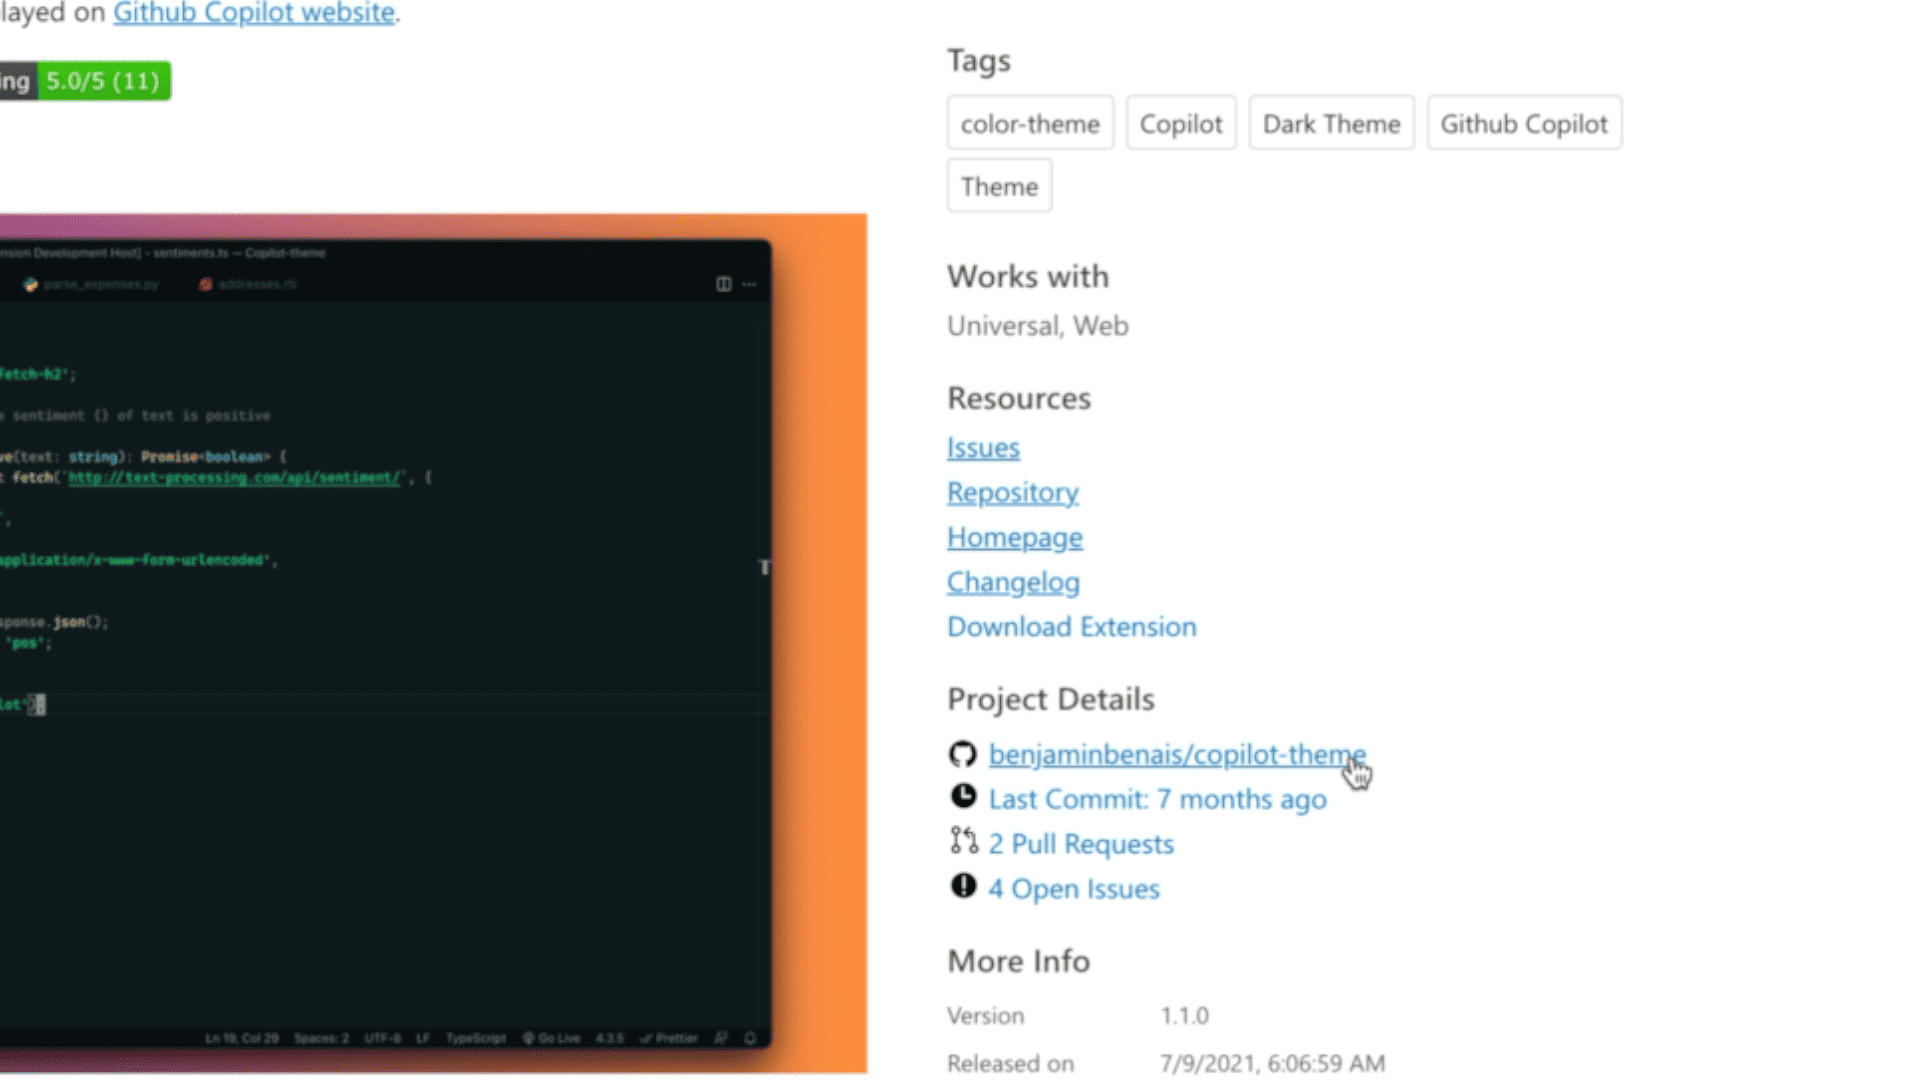
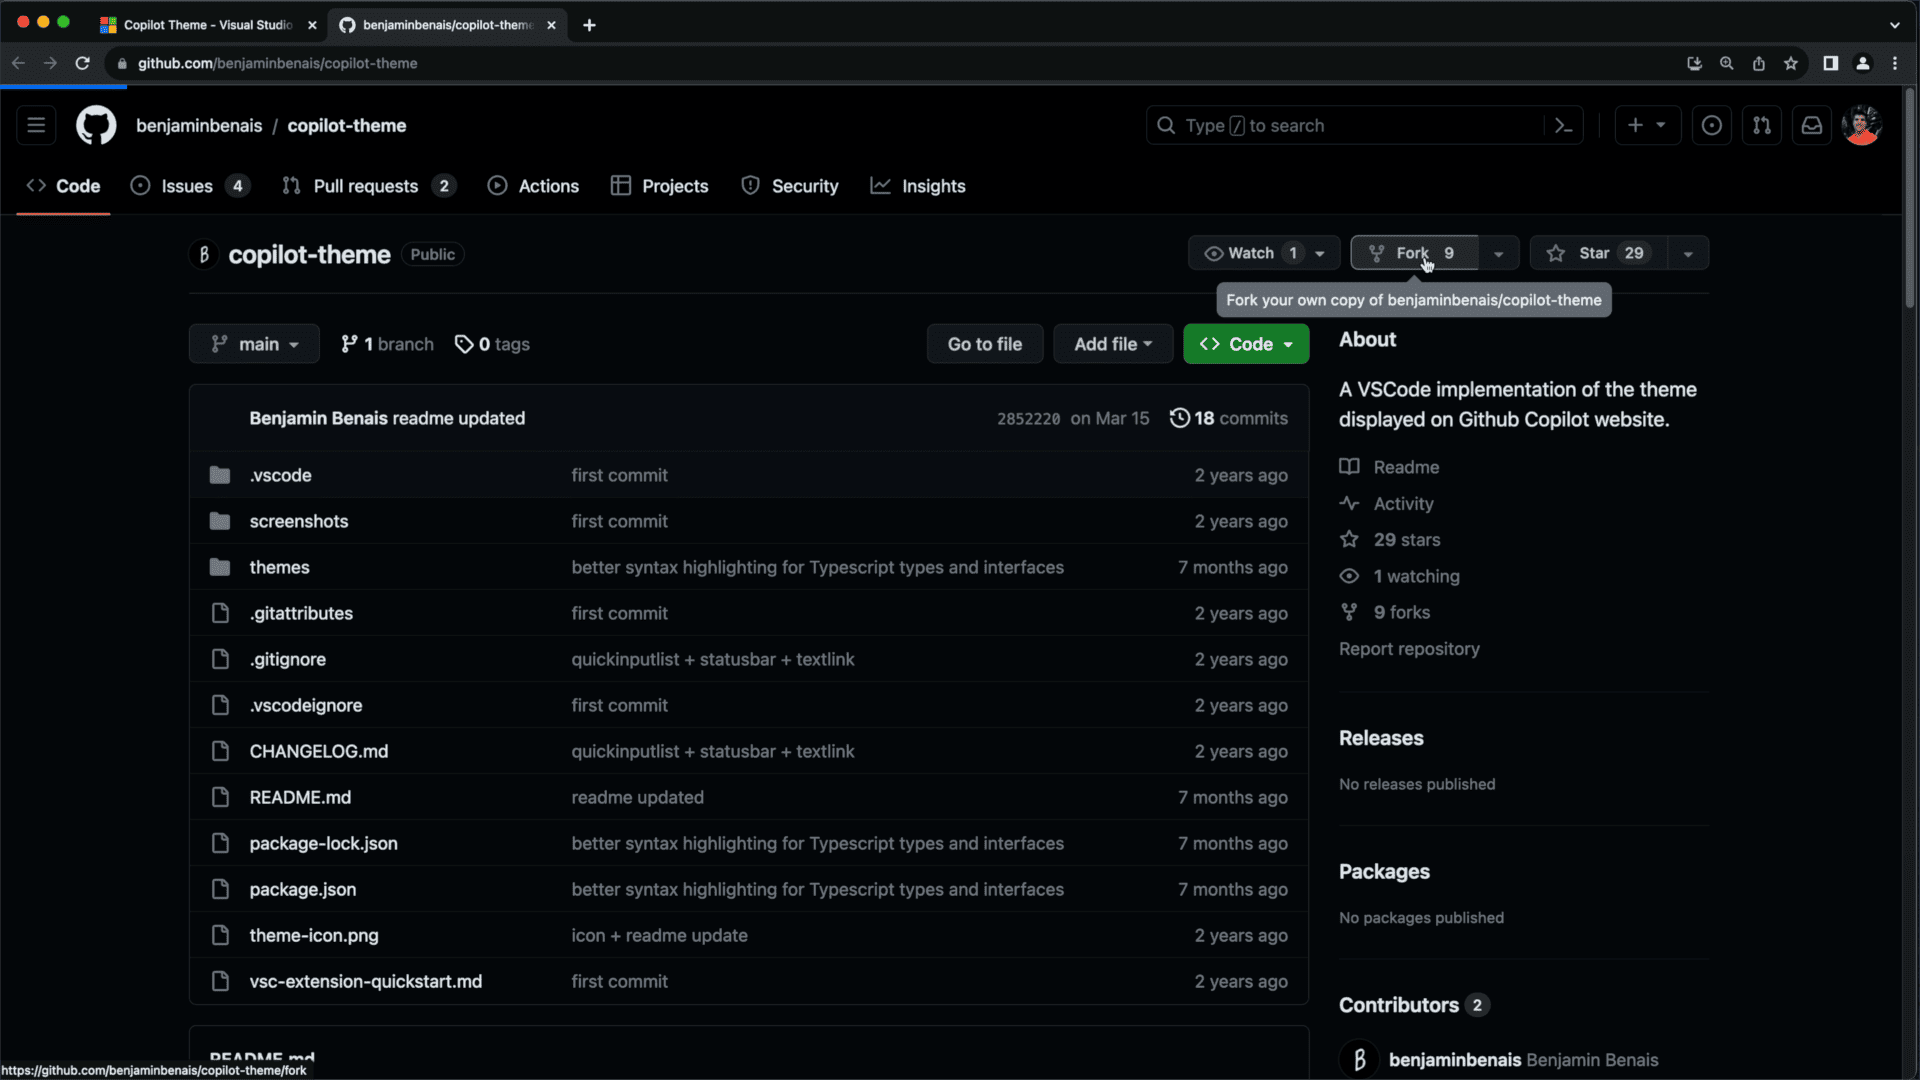
- Fork the Theme: Once you’ve picked a theme, find its GitHub repository link under the project details. Use the ‘Fork’ feature on GitHub to create a copy of the theme in your account. This allows you to modify it without affecting the original version. You can name the forked theme and add a description to differentiate it from the original.


Modifying Theme Elements
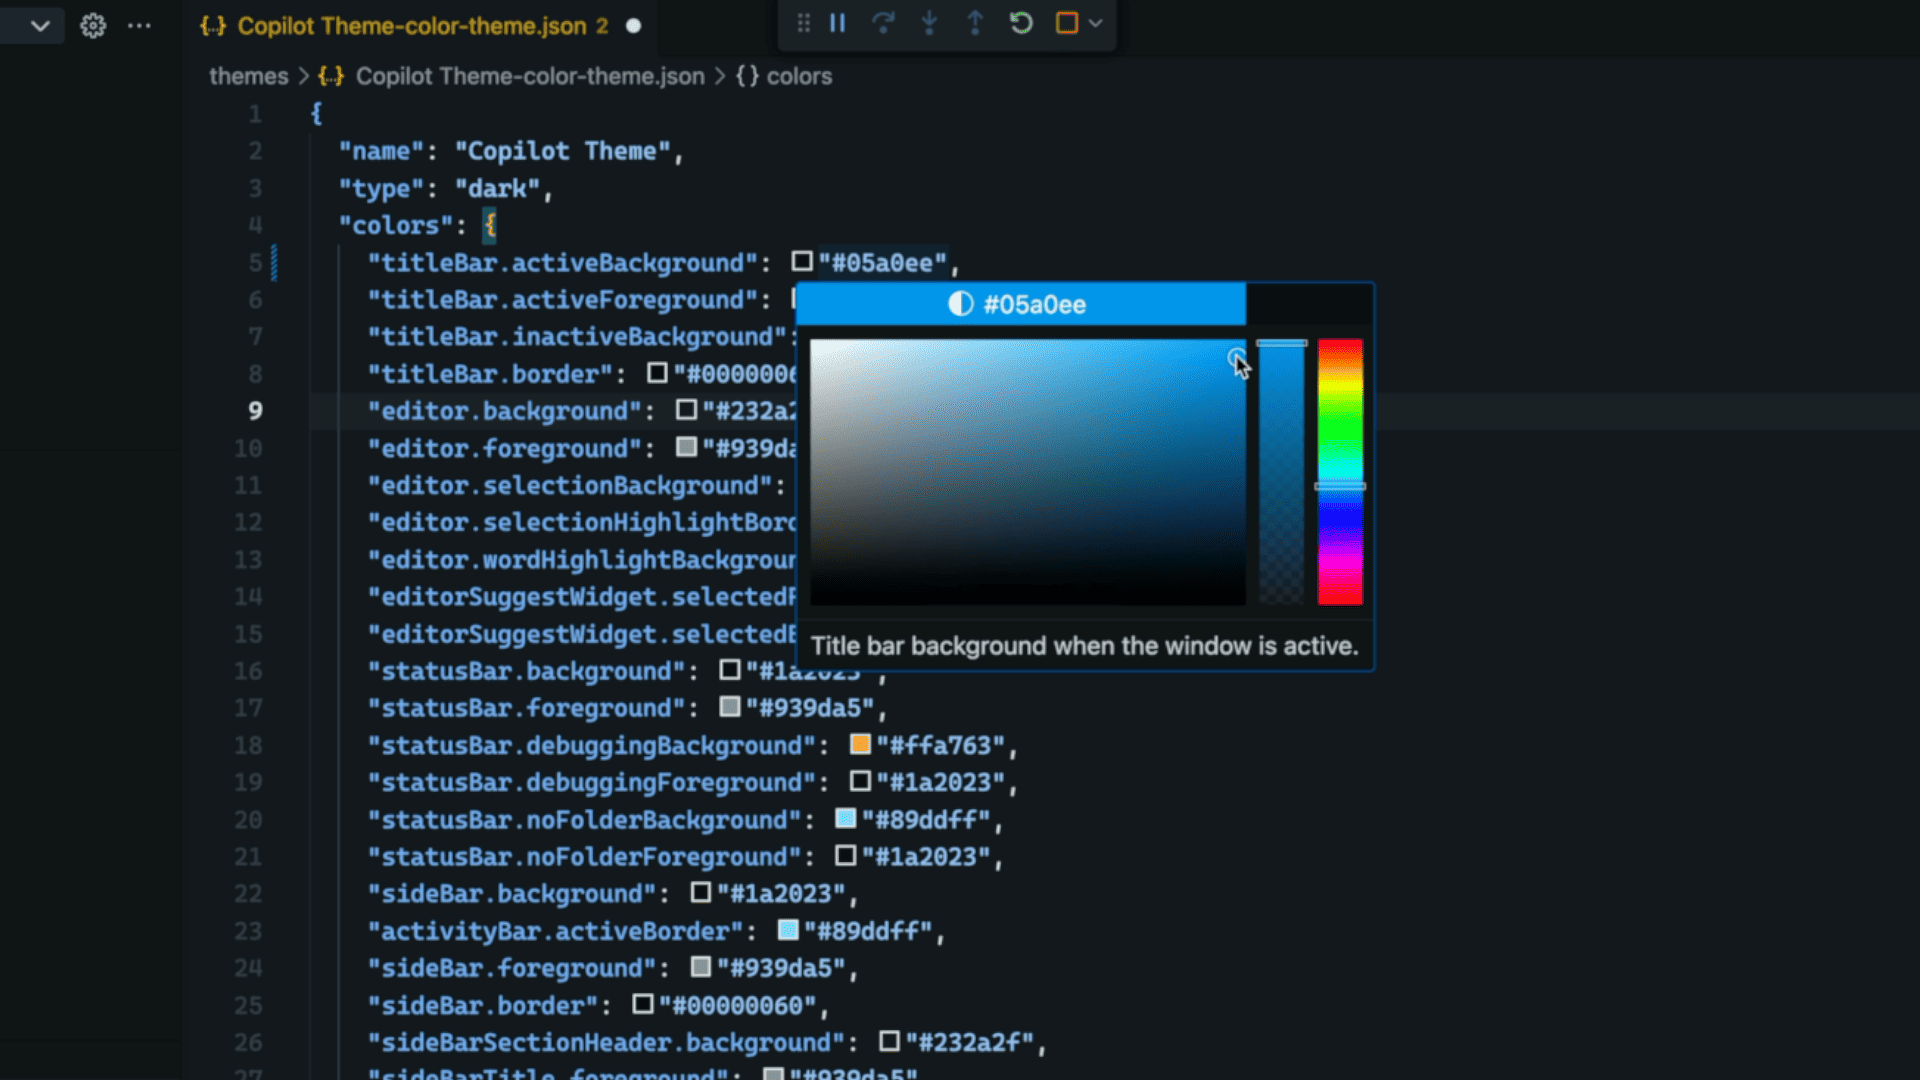
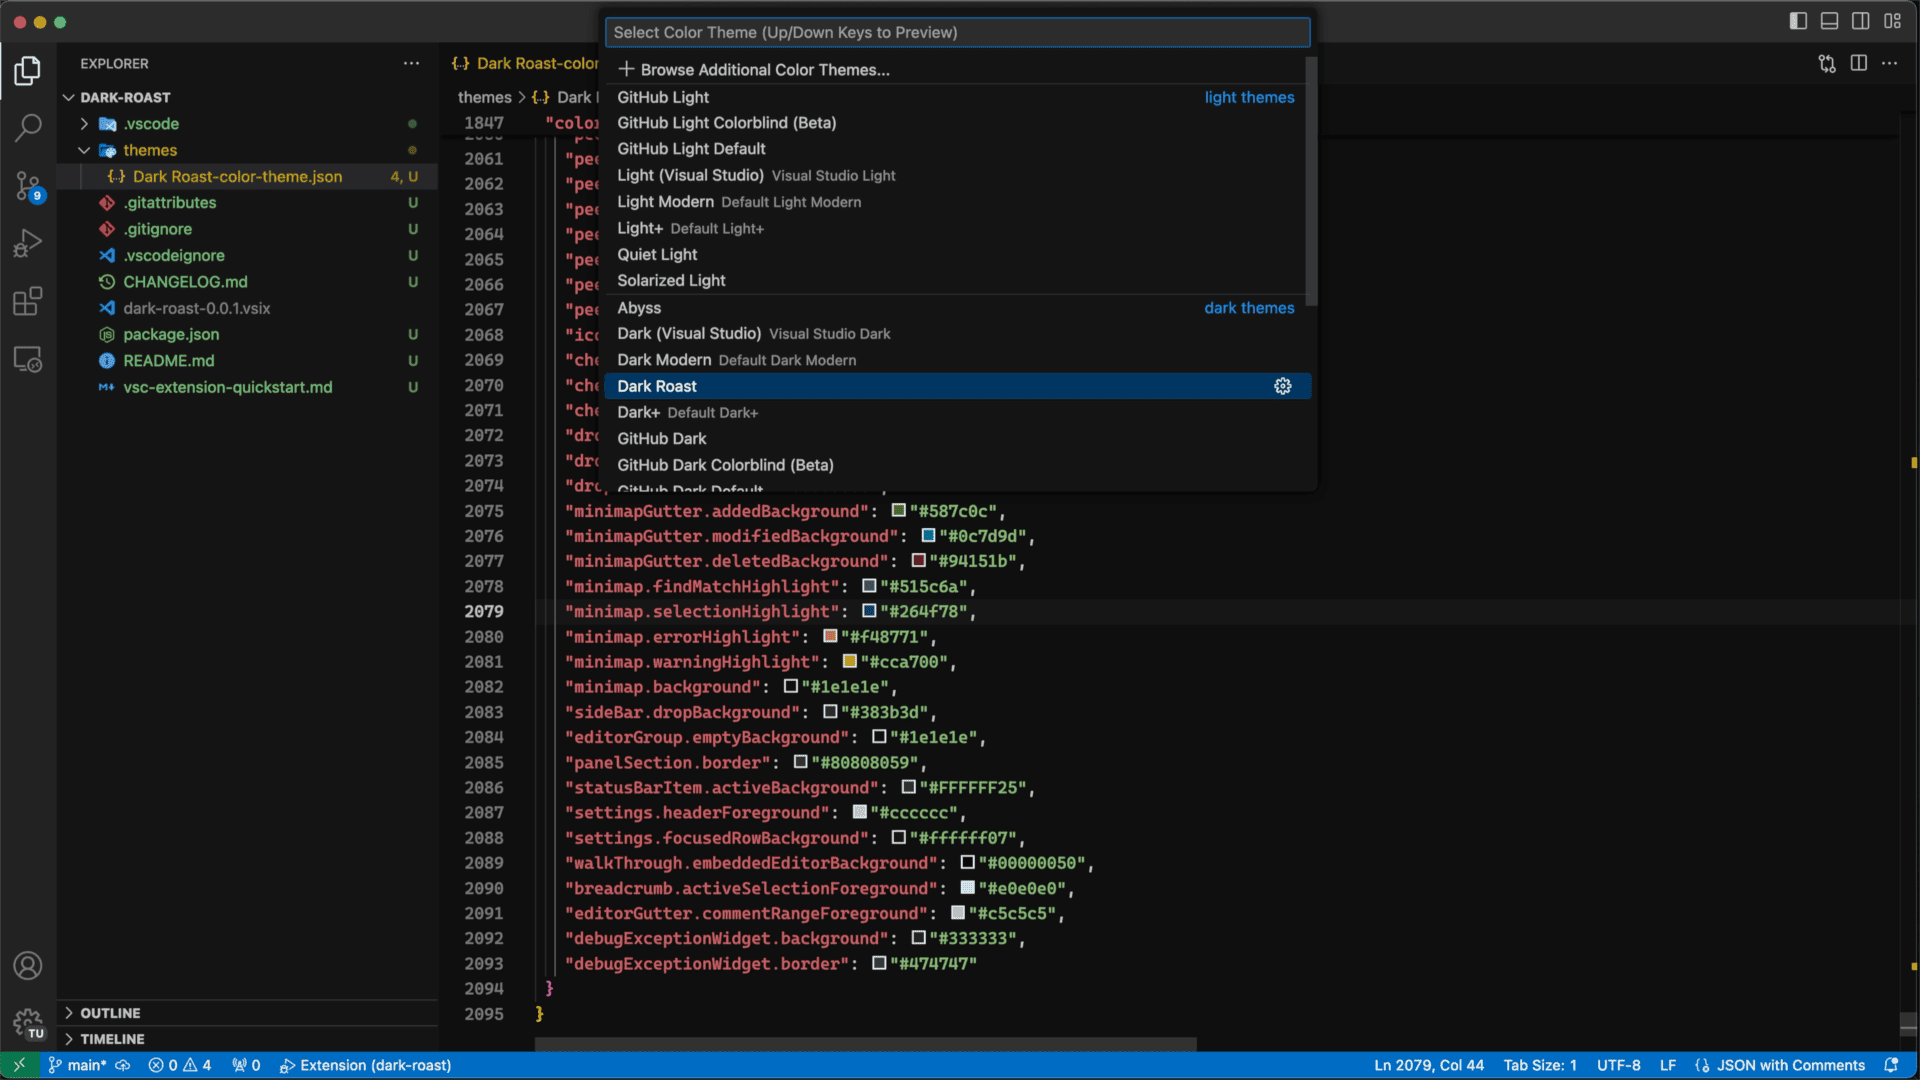
- Access Theme Files: In your VS Code, navigate to the themes folder of your forked project and open the
color-theme.jsonfile. This file contains all the color definitions for your chosen theme. - Preview Changes in Real Time: To see the effects of your changes as you make them, press F5. This launches the extension development host, a separate VS Code window that reflects your theme changes instantly.
Customization Techniques
- Experiment with Colors: For instance, you might want to change the title bar’s background color. Simply hover over the color value in the JSON file, and VS Code will display a color picker for easy selection.
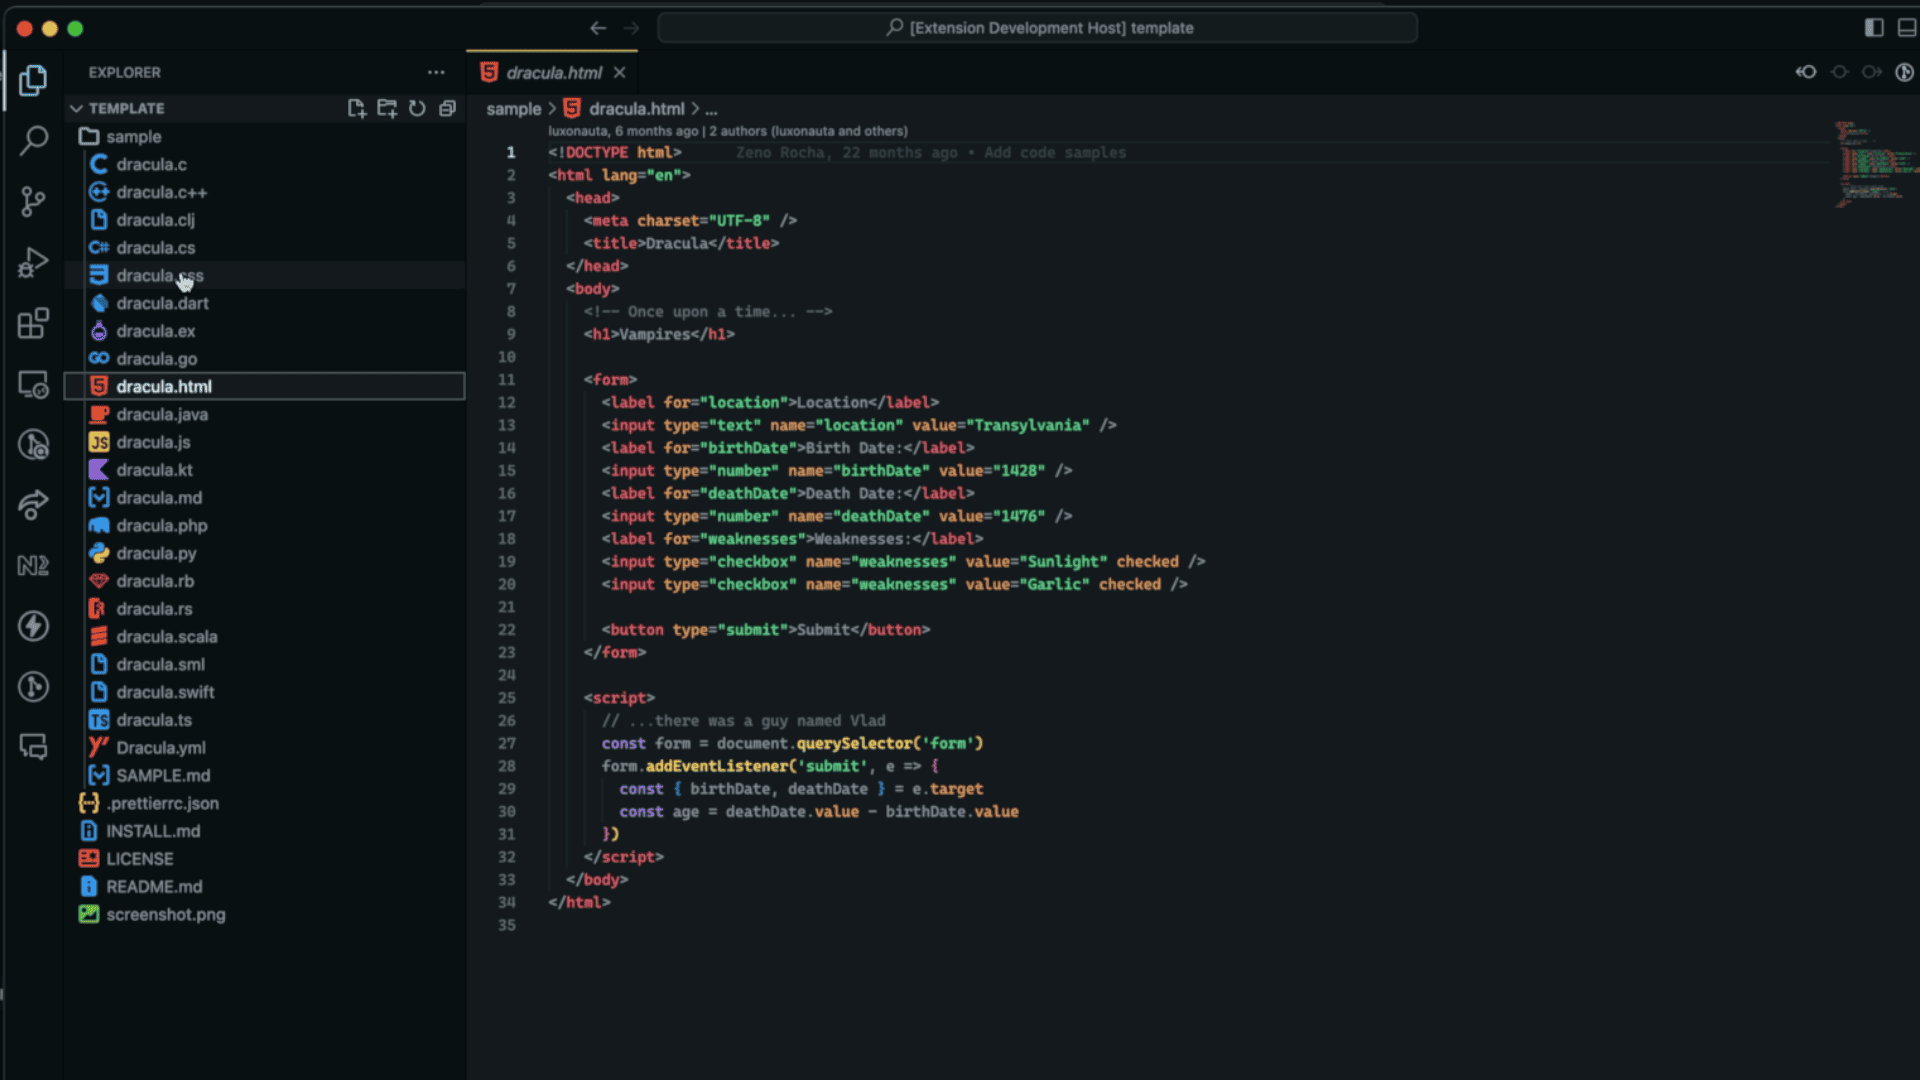
- Use Sample Files for Testing: Open sample files from other themes or create your own to see how your theme colors appear with various code elements. This helps in understanding how your changes will look in a real-world coding scenario.
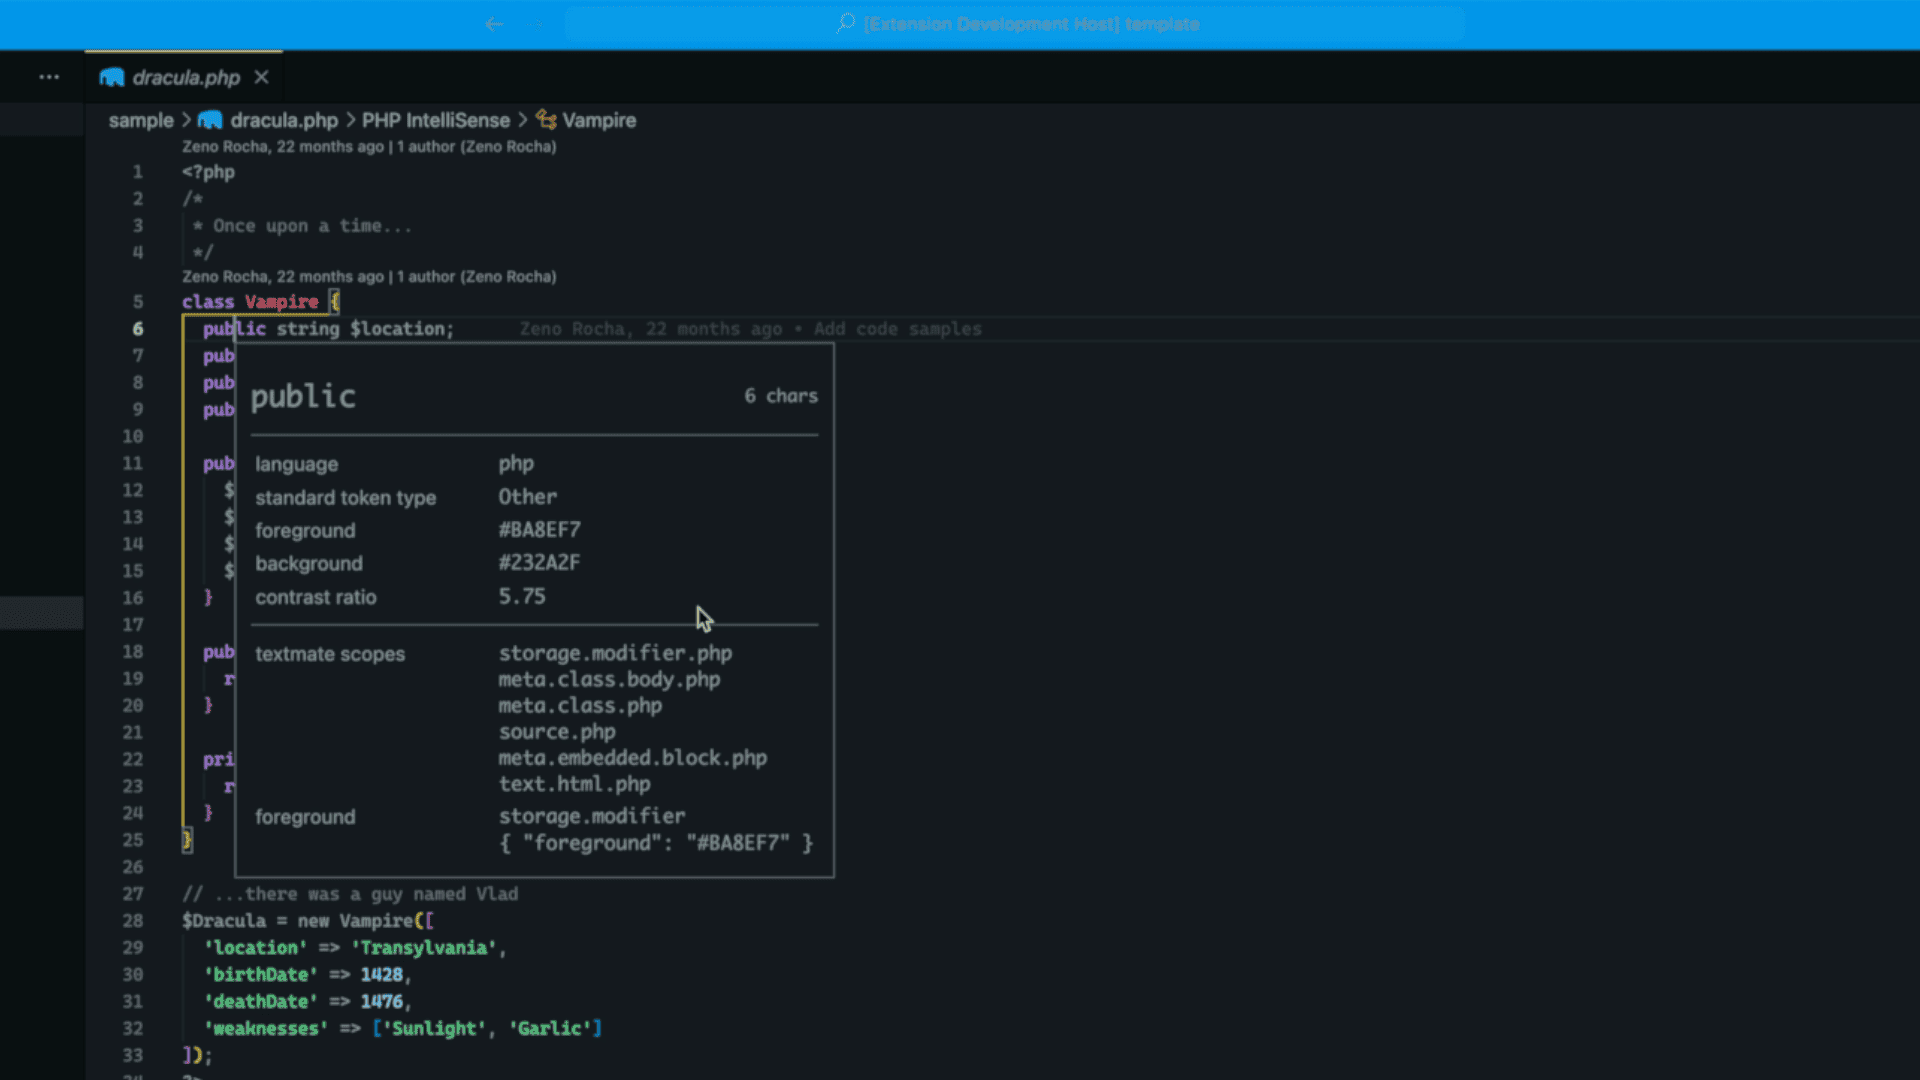
- Inspect Editor Tokens and Scopes: This powerful tool in VS Code allows you to inspect and modify the color tokens used for different parts of the editor. Activate it by pressing Command + Shift + P (or Ctrl + Shift + P on Windows/Linux) and selecting ‘Developer: Inspect Editor Tokens and Scopes’. As you hover over different parts of the code in the editor, it shows you the exact color values and tokens being used, allowing you to fine-tune the appearance of syntax elements, comments, and more.


Final Touches
- Refine the Theme: Once you are satisfied with the color adjustments, it’s crucial to update the theme’s metadata. Modify the
package.jsonfile to reflect the new theme name, description, publisher information, etc. - Update the README: Document your changes and the theme’s new features in the README file. This is especially important if you plan to share or publish your theme for others to use.
By following these steps, you can effectively customize an existing VS Code theme, making it more aligned with your personal preferences and coding style. This personalized approach not only enhances the visual appeal of your coding environment but also can improve your overall experience and productivity as a developer.
Creating a Theme from Scratch in VS Code
Creating a custom theme from scratch in Visual Studio Code (VS Code) is an exciting process that allows for complete creative control. Here’s a step-by-step guide to help you build your very own theme:
Setting Up the Environment
- Yeoman and VS Code Extension Generator: These are essential tools for theme development. Install them using the command
npm install -g yo generator-code. Yeoman helps scaffold your project, while the extension generator sets up the basic structure of a VS Code theme.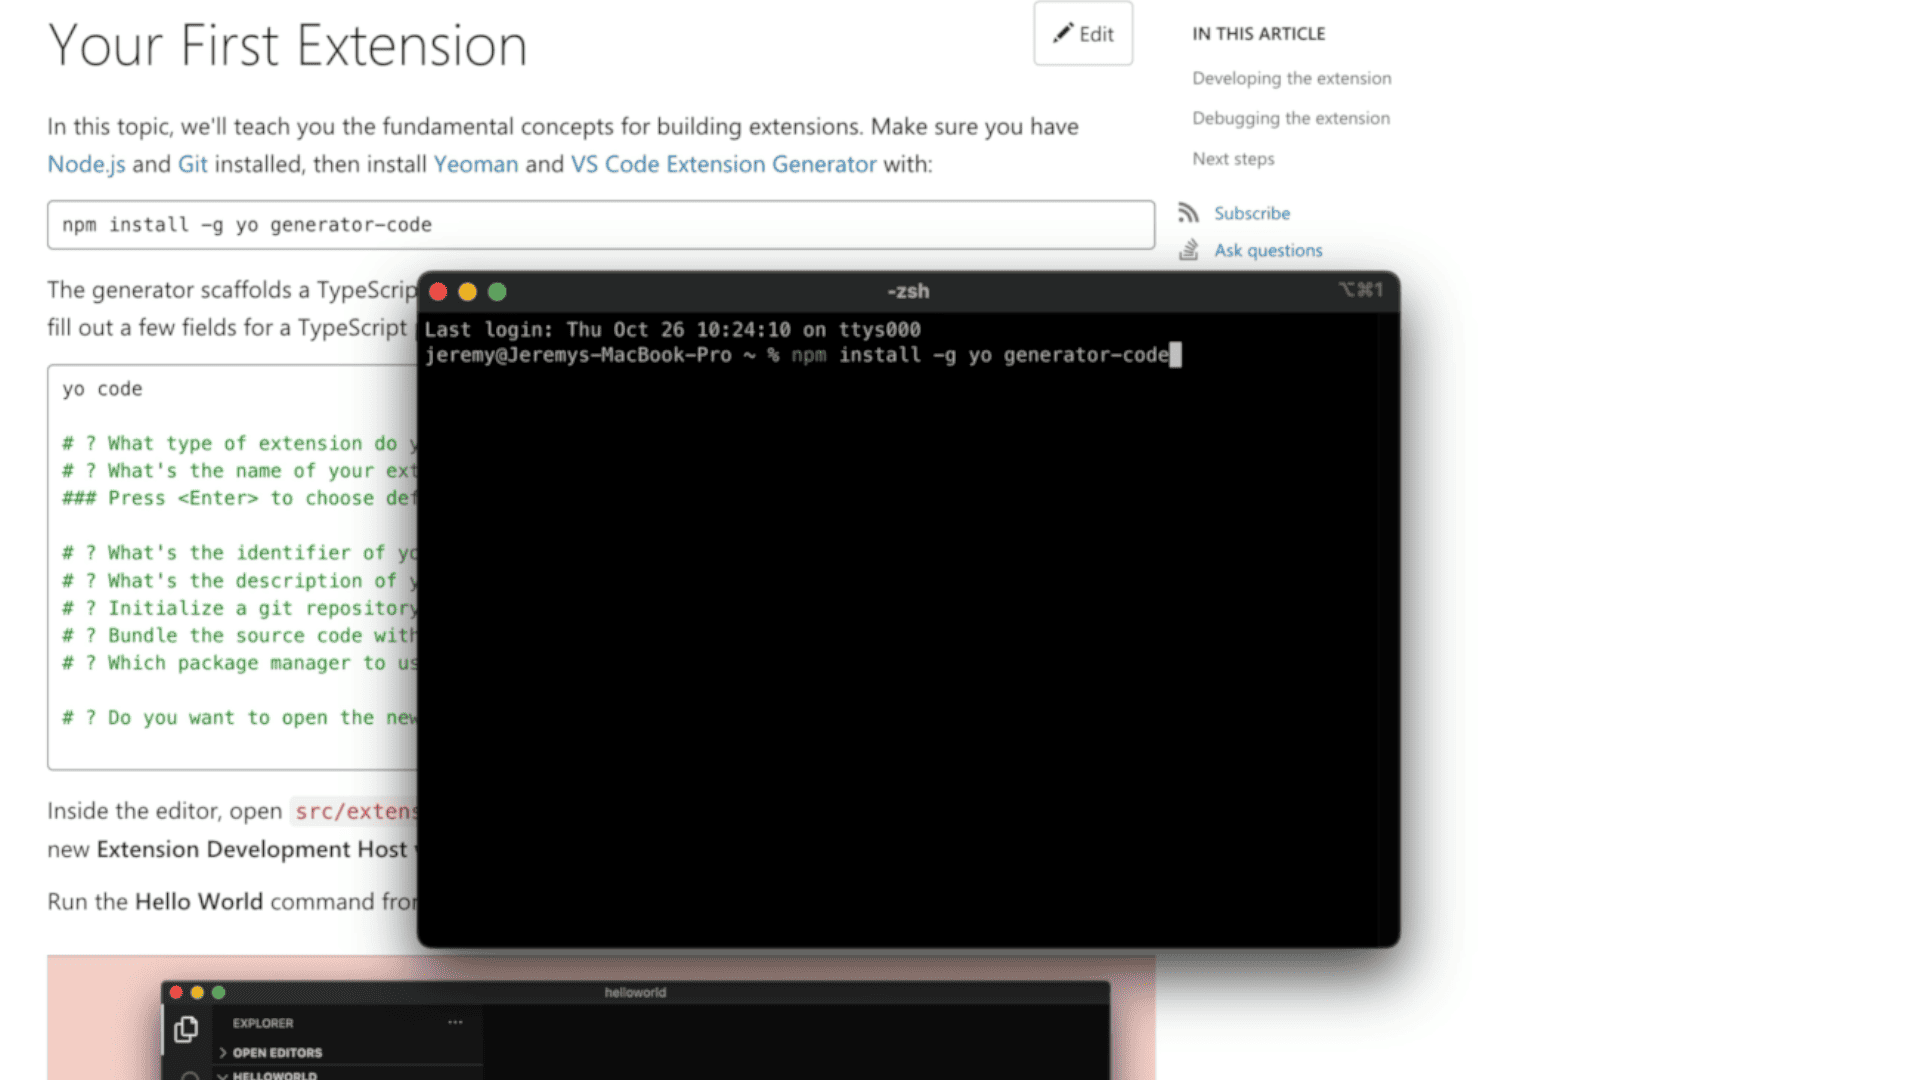
- Start the Theme Creation Process: Open your terminal and navigate to the directory where you want to create your theme. Type
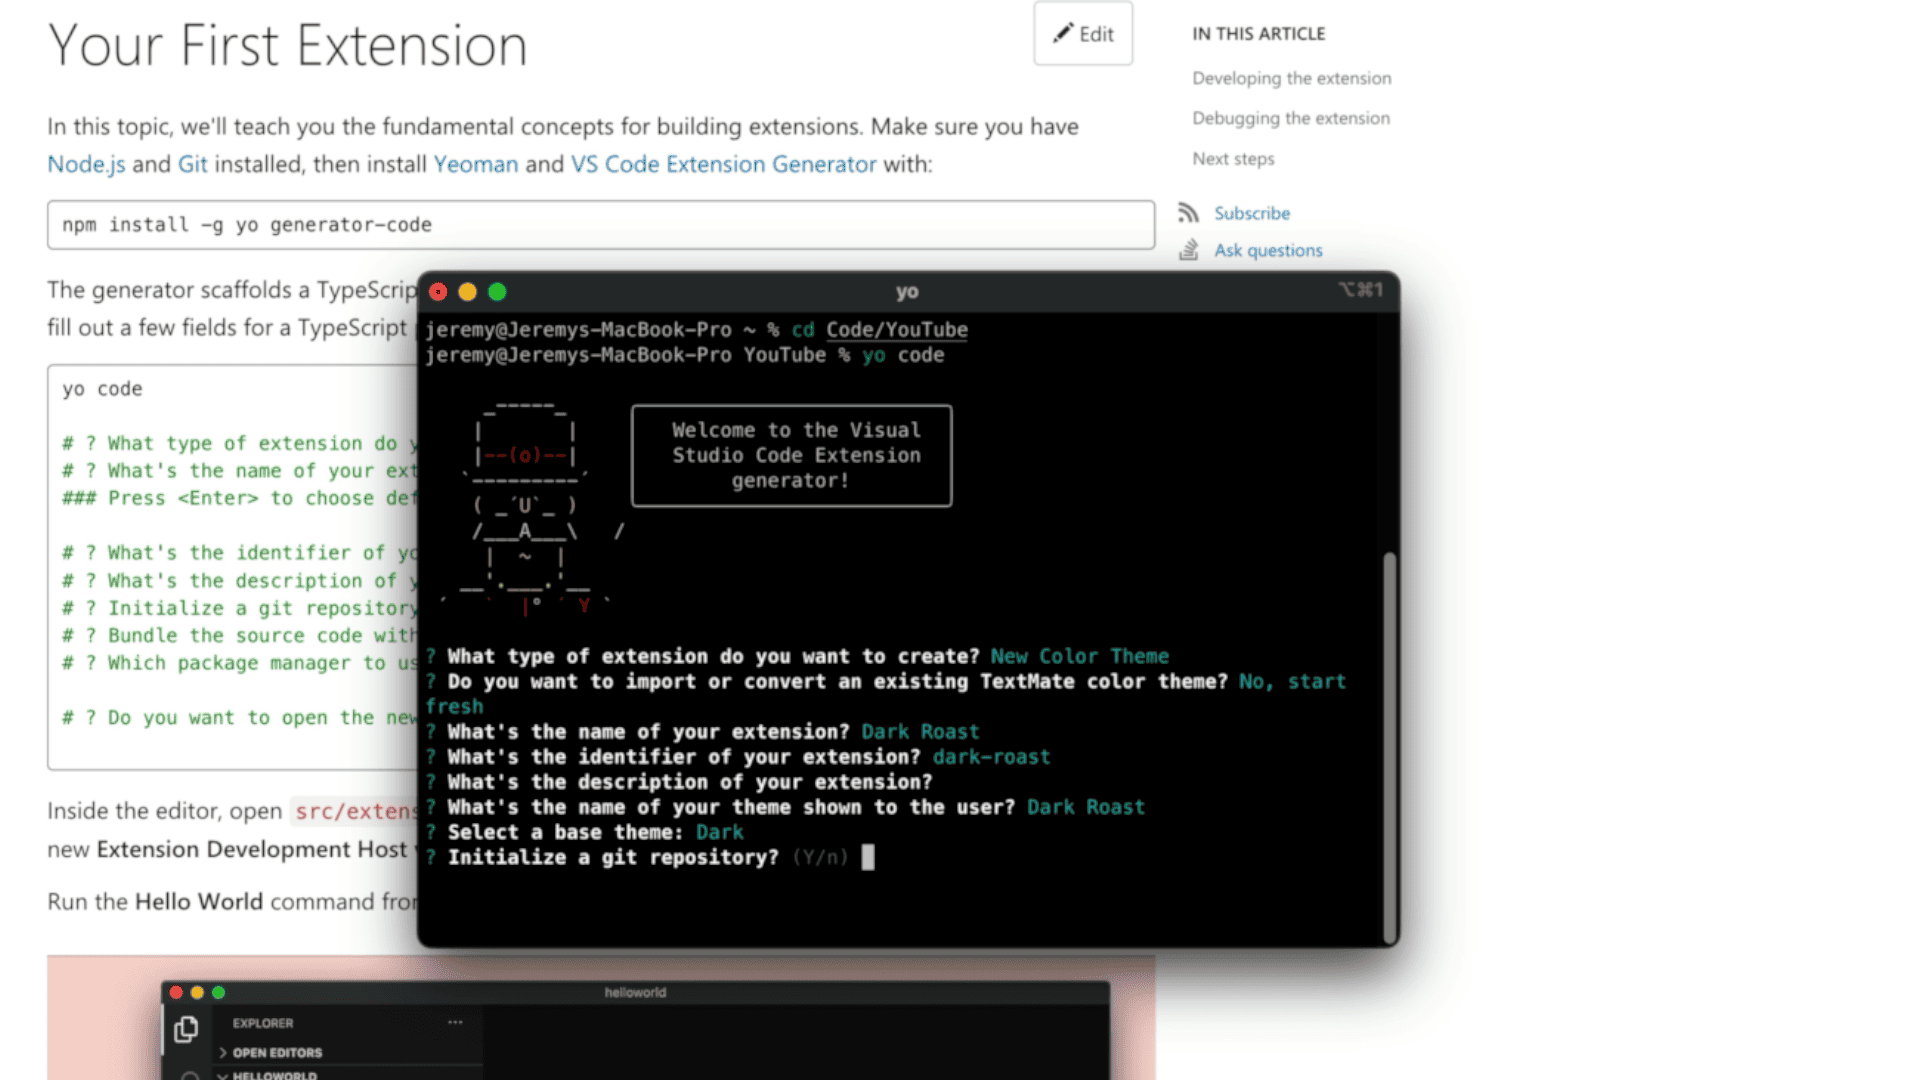
yo codeand hit enter to launch the Yeoman generator. - Select ‘New Color Theme’: When prompted, choose to create a new color theme. This option will guide you through the process of setting up the basic structure for a VS Code color theme.
- Name Your Theme: You’ll be asked to provide a name for your theme. For example, if you’re creating a theme with a coffee-inspired aesthetic, you might name it ‘Dark Roast’.
- Set the Base Theme: Choose a base theme (light or dark) as a starting point. This will pre-populate your theme with a set of default color values, which you can then customize.


Customizing Your Theme
- Open the
color-theme.jsonFile: This file, located in the ‘themes’ directory, is where you’ll define all your color choices for different elements in the editor. Use the F5 Key: Similar to customizing an existing theme, pressing F5 will open the extension development host for real-time previews of your changes. - Inspect Editor Tokens and Scopes: Use this feature to accurately identify and modify the colors of various editor elements, tokens, and syntax highlights.
- Activity Bar, Title Bar, etc.: Modify elements like the activity bar badge background, title bar, editor background, and syntax colors. For instance, if you’re following the ‘Dark Roast’ theme, you might choose warm, coffee-inspired tones.
Using Online Tools for Efficiency
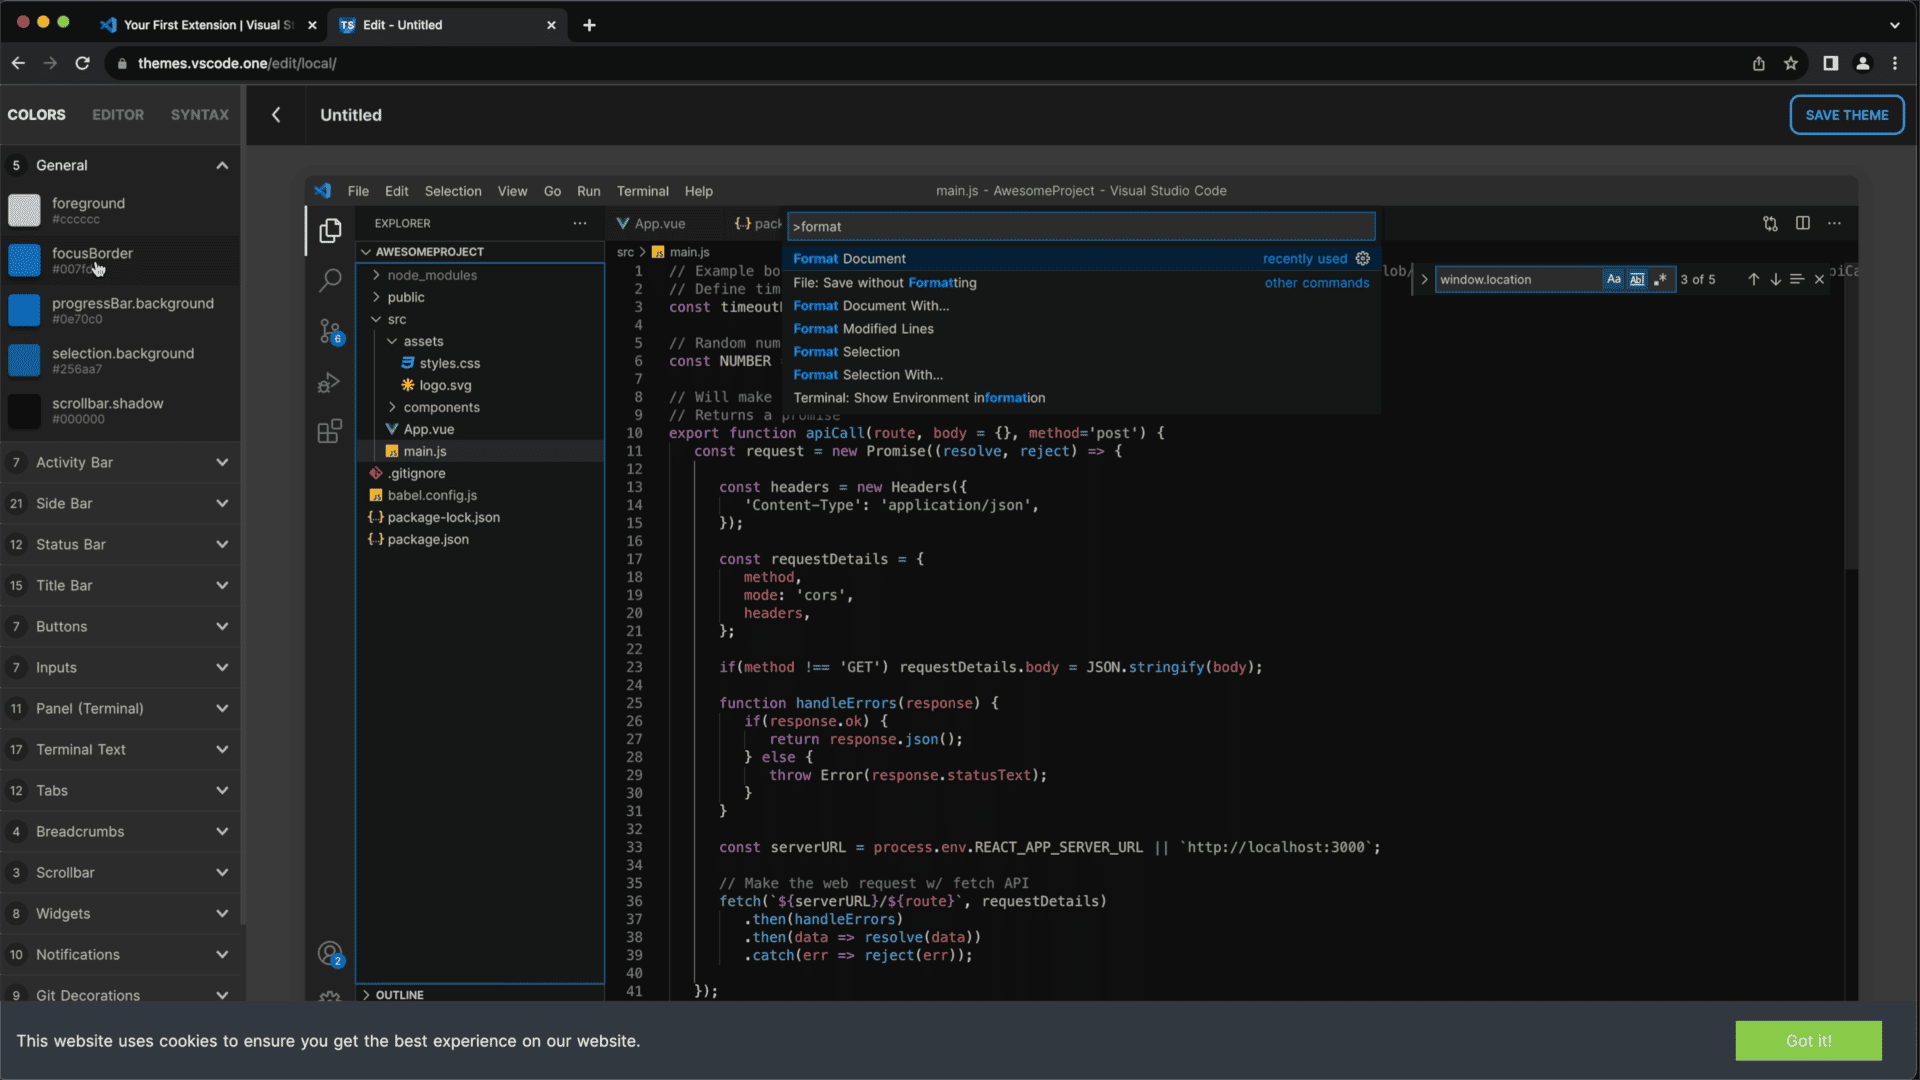
- Web-based Theme Editors: Platforms like themes.code.one provide user-friendly interfaces to create and modify themes. They offer real-time previews and simple color pickers, making the process faster and more intuitive.
- Export and Integrate: Once you’re happy with your theme in the online editor, you can download the
color-theme.jsonfile and integrate it into your VS Code theme project.

Creating a theme from scratch is a rewarding process that not only enhances your own coding environment but also allows you to contribute to the vibrant VS Code community. Whether for personal use or sharing with others, a custom theme adds a touch of personality and style to the coding experience.
Sharing Your Custom VS Code Theme
Once you have created and fine-tuned your custom theme in Visual Studio Code (VS Code), the next steps are to package it and, if desired, share it with the broader VS Code community. This part of the process involves a few key steps to ensure your theme is ready for distribution.
Packaging Your Theme
- Installation Command: In your terminal, run
npm install -g @vscode/vsce. The VS Code Extension Manager (vsce) is a command-line tool that helps in packaging and publishing VS Code extensions.
- Update
package.json: Ensure all the necessary fields in thepackage.jsonfile are correctly filled. This includes the name, version, description, and publisher of your theme. - Repository and License Information: Include a link to the theme’s repository and a license. These are important for users to understand the source and usage rights of your theme.
- Check for Warnings: Run
vsce packagein your theme’s directory. Address any warnings or errors thatvscemight report. - Packaging Command: Execute
vsce packagein the directory containing your theme. This command will generate a.vsixfile, which is the packaged version of your theme.

Installing Your Theme in VS Code
After packaging your theme into a .vsix file, you may want to test it in your VS Code environment before publishing it. Installing it directly in VS Code is a straightforward process:
- Open Command Palette: Use
Ctrl+Shift+P(orCmd+Shift+Pon Mac) to open the Command Palette in VS Code. - Install from VSIX Command: In the Command Palette, type and select
Install from VSIX. This command allows you to install extensions that are not directly downloaded from the VS Code Marketplace.
- Select the
.vsixFile: Navigate to the location where your.vsixfile is saved and select it. This file is the packaged version of your custom theme. - Complete the Installation: Once you select the file, VS Code will install your custom theme. After the installation is complete, you can switch to your new theme via the theme selection menu.


By installing your theme directly in VS Code, you get a clear picture of how it will appear to end users. This step is crucial for quality assurance and fine-tuning before you consider publishing your theme to the wider community.
Additional Resources
- Best VS Code Dark Themes
- Sample Template Files
- Color Theme Docs
- Yeoman and VS Code Extension Generator
- Online Theme Tool
- Publishing Extensions
Remember, personalizing your VS Code environment not only enhances its appearance but also improves your overall coding experience. Try it out and make your coding environment uniquely yours!