Console applications are great if you do not have to have a graphical user interface (GUI) for your application. They are also perfect for beginners just getting started with C# because they eliminate all of the distractions and allow you to write simple applications specifically tailored for learning or trying things out. In this tutorial, I am going to show you how to create an empty C# console application in Visual Studio 2015.
Let’s Get Started
First off you need to make sure that you have Visual Studio installed on your computer. I will be using Visual Studio 2015 for this tutorial, but older versions of Visual Studio should work just fine. For more information regarding Visual Studio take a look at my post Getting Started with Visual Studio.
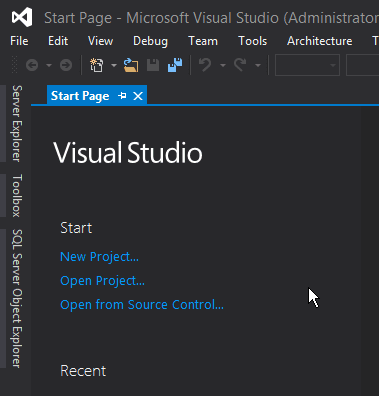
To create a new console application, open Visual Studio and you will be taken to the start screen. Click “New Project…” as shown in the image below or press Ctrl + Shift + n to create a new project.

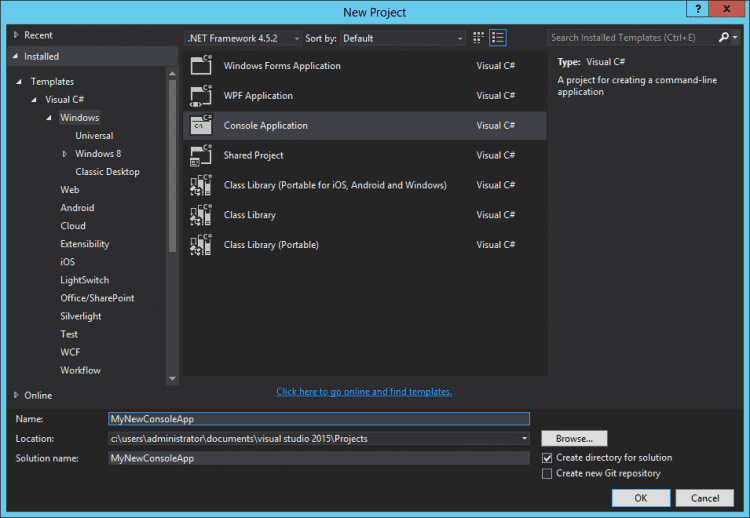
You will be taken to a new project dialog where you will choose “Console Application” under Templates – Visual C# – Windows as shown below.

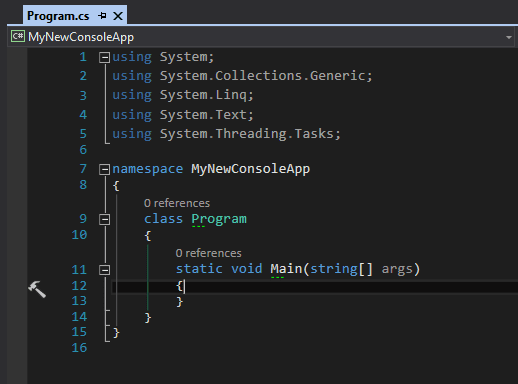
After giving your application a name, click “OK”. A new console application project is created with the name you provided. You should see some C# code similar to the screenshot below.

Congratulations! You now have a blank console application to do whatever you want. Now it’s time to start making C# applications. If you don’t know what to make or need help getting started, be sure to check out one of my C# walkthroughs.
